How To Install PHP With Apache
Merhaba Sevgili Ziyaretçilerimiz;
NetBufe.Com Kazanç amacıyla kurulmamış ve ücretsiz yararlanılan bir sitedir. Video içeriklerinde yer alan reklamlar ile NetBufe.Com sitesinin hiçbir menfaat bağlantısı söz konusu olmayıp ilgili reklamlar videonun yüklü olduğu siteler tarafından veya videoların yüklü olduğu sitelere yüklemeyi yapan kişilerce eklenmiş reklamlardan ibarettir.
Videoların paylaşıma açıldığı sitelerde yüklü videolar/video linkleri herhangi bir nedenle kaldırıldığında ve/veya kısıtlandığında/yasaklandığında sitemizde de ilgili videonun gösterimi otomatik olarak son bulmaktadır.
Telif Hakkı(Copyright Notice) Olabilecek Açık Kullanım İzni Verilmemiş Video Materyaller Hakkında Önerimiz İlgili Videoyu İzlemeyerek(Bu Yönde Materyallerin İzlenmesine Destek Vermeyerek), Resmi Olarak Satın Alıp İzlemeniz Yönündedir.
Tarafımızdan Üyelerimizin sayfamız üzerinde ayrıntılı olarak yer alan tüm bu durumlara ilişkin bilgi ve gerekleri okuyup anladıkları ve kabul ettikleri varsayılmaktadır.
Sitemize ücretsiz ve kolayca üye olarak birçok video paylaşım sitelerindeki kendi videolarınızın linklerini ekleyebilir, Sık Kullanılanlar ve Çalma Listelerinize kaydedebilir ve üye olmanın diğer tüm ayrıcalıklarından üye sosyal alanınızda yararlanabilirsiniz. Video Linkleri Ekleyebileceğiniz Örnek Bazı Siteler
NetBufe.COM
Açıklama
Follow this step by step guide to learn how to install php with apache in a few simple steps
Don't forget to check out our site http://howtech.tv/ for more free how-to videos!
http://youtube.com/ithowtovids - our feed
http://www.facebook.com/howtechtv - join us on facebook
https://plus.google.com/103440382717658277879 - our group in Google+
In this tutorial, we will show you how to install PHP with apache. This step by step guide will guide you on how to download the initial setup file to complete installation.
Step 1 -- Open Php for Windows website
Before we teach you how to install php with apache, we need to download the setup file first.
In order to do so, open up any browser and log on to "windows.php.net". Once the webpage loads, move to the download section.
Step 2 -- Download the application
Over here, scroll down and move to the archives section. Now you will need to download the application according to your system. Since we are running a 32 bit operating system here, we will search for and download the "php-5.3.5-win32-VC6-x86.msi" file.
Step 3 -- Continue with the Installation Wizard
Once the download has been completed, simply double click on it to open up the installation wizard.
With that done, the installation wizard splash screen will appear. Simply click on Next to continue with the process.
Next, you will need to agree to the terms in the license agreement. Once done, you can move on to the next step.
Step 4 -- Set installation path
Over here, you will need to set the path for the installation. Over here, we will simply keep the path "C: \PHP" and move on to the next step.
Step 5 -- Select Web Server
Next, you will need to select the web server. Over here, we will select the Apache 2.2 x Module to continue installing php with apache.
Step 6 -- Set server path
Now we will be required to set the path for the server. Over here, let's keep it simple and define the path as "C :\Apache\conf\" in order to proceed installing php with apache.
Step 7 -- Install PHP
With that done, simply click on install in the next step and the installation will continue automatically.
Step 8 -- Work with the configuration file
Once the installation has been completed, we will load the PHP module for Apache 2.x server. In order to do that, access the conf directory and open up the "httpd.conf" file using Notepad.
At the bottom of the configuration file, find the text PHPIniDir "". In the middle of those quotes, type the location where you have installed php. For example in this case, it will be "C :\PHP".
In the next line notice that no path is defined for the "php5apache2_2.dll" file. Over here, we will add the same path as we did before; so before the filename, add the path "C :\PHP\ " and save the changes made.
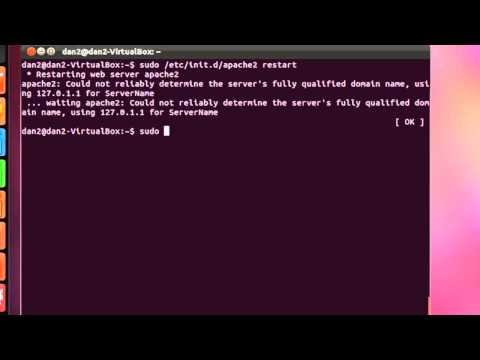
Step 9 -- Restart Apache
Now let's use the shortcut key "windows+ r" to open up the run command. Over here, type services.msc to open up the services window. Move to the pane towards the right side of the screen and double click on Apache to restart the service. This is so that the changes made earlier can take effect.
Step 10 -- Create server file
With that done, move to the htdocs directory and over here create a new text file named "phpinfo.txt". Open up the file and type:
php
phpinfo();
Step 11 -- Save the php info file
With that done, save the file as phpinfo.php. This file will basically help you to easily view information about your server.
Step 12 -- View the php information
With that done, open up the browser, type "localhost/phpinfo.php" in the address bar above and hit enter. This page will show you all the information you need about the current PHP version installed.