How To Install PhpMyAdmin In Windows 7
Merhaba Sevgili Ziyaretçilerimiz;
NetBufe.Com Kazanç amacıyla kurulmamış ve ücretsiz yararlanılan bir sitedir. Video içeriklerinde yer alan reklamlar ile NetBufe.Com sitesinin hiçbir menfaat bağlantısı söz konusu olmayıp ilgili reklamlar videonun yüklü olduğu siteler tarafından veya videoların yüklü olduğu sitelere yüklemeyi yapan kişilerce eklenmiş reklamlardan ibarettir.
Videoların paylaşıma açıldığı sitelerde yüklü videolar/video linkleri herhangi bir nedenle kaldırıldığında ve/veya kısıtlandığında/yasaklandığında sitemizde de ilgili videonun gösterimi otomatik olarak son bulmaktadır.
Telif Hakkı(Copyright Notice) Olabilecek Açık Kullanım İzni Verilmemiş Video Materyaller Hakkında Önerimiz İlgili Videoyu İzlemeyerek(Bu Yönde Materyallerin İzlenmesine Destek Vermeyerek), Resmi Olarak Satın Alıp İzlemeniz Yönündedir.
Tarafımızdan Üyelerimizin sayfamız üzerinde ayrıntılı olarak yer alan tüm bu durumlara ilişkin bilgi ve gerekleri okuyup anladıkları ve kabul ettikleri varsayılmaktadır.
Sitemize ücretsiz ve kolayca üye olarak birçok video paylaşım sitelerindeki kendi videolarınızın linklerini ekleyebilir, Sık Kullanılanlar ve Çalma Listelerinize kaydedebilir ve üye olmanın diğer tüm ayrıcalıklarından üye sosyal alanınızda yararlanabilirsiniz. Video Linkleri Ekleyebileceğiniz Örnek Bazı Siteler
NetBufe.COM
Açıklama
Follow this comprehensive step by step guide on how to install php my admin in Windows 7
Don't forget to check out our site http://howtech.tv/ for more free how-to videos!
http://youtube.com/ithowtovids - our feed
http://www.facebook.com/howtechtv - join us on facebook
https://plus.google.com/103440382717658277879 - our group in Google+
In this tutorial, we will guide you on how to install phpmyadmin in windows 7. This tutorial will walk you through from the initial downloading phase till the complete installation at the very end.
Step 1 -- Download phpmyadmin
Before we teach you how to install phpmyadmin in windows 7, we need to download it first. In order to do so, log on to "phpmyadmin.net/home_page/downloads.php" and click on the download button.
This will redirect you to the download page where you can download phpmyadmin according to your requirements. For example, here we will download 3.5.5 for English. You can even download for all languages if you want to.
Step 2 -- Extract the Zip File
Once downloaded, extract the zip file and save it on your desktop. Next, open up the htdocs folder in the Apache directory within the C Drive. Over there, paste the extracted folder and rename it to "phpmyadmin".
Step 3 -- Open phpmyadmin in localhost
Now open the browser, move to the address bar, type "localhost/phpmyadmin" and hit enter. With that done, the phpMyAdmin directory will open up but it will not be properly configured with MySQL right now.
Step 4 -- Open the configuration file
In order to configure it, open up the conf folder within the apache directory and open up the httpd.conf file.
Step 5 -- Edit directory Index
For installing phpmyadmin properly, we will edit the directory index. Instead of index.html, we will rename it to index.php. With that done, save and close the file.
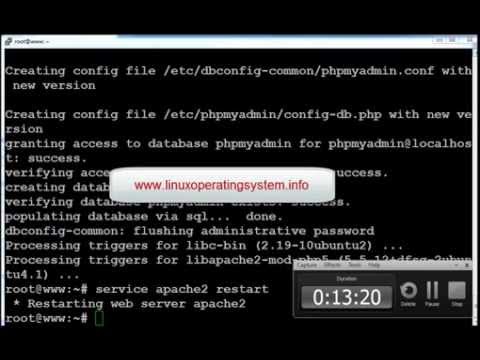
Step 6 -- Open Services.msc
Now open up the run command and type services.msc. This will open up the services window.
Over there, select Apache and restart the services for the changes to take effect.
Step 7 -- Open phpmyadmin
Now open up the browser and log on to "localhost/phpmyadmin". Now you can see that phpMyAdmin opens up properly configured with MySQL. Now you can log in with your username and password and enter the dashboard. Installing phpmyadmin has been completed successfully.
![Wolfteam Log Hatası Çözümü %100 [SESLİ] (Windows 10,Windows 8.1,Windows 7,Windows XP) 2018](https://i.ytimg.com/vi/p3pDJvf91ik/hqdefault.jpg)